
This easy apple pie bars (canned pie filling) recipe is quick to make with canned apple pie filling and a simple, mouth-watering shortbread crust! They're incredibly delicious with warm spices and the perfect dessert for any occasion!

Jump to:
These apple pie bars are one of my favourite desserts to make for Thanksgiving! There's always apple pie, but when my family sees these delicious bite-size apple pie squares they always reach for them over the apple pie!
My favourite thing about this recipe is that I use canned apple pie filling. I don't know about you, but I have no patience for peeling and slicing a bunch of apples!
That's why I like to use canned pie filling, just like in my other apple desserts like this apple pie with canned apples, apple crisp with canned apples, granola apple crisp, apple spice cake, apple pie tarts, my apple pie with puff pastry crust, and this three ingredient apple cobbler!
Why this is the best recipe
- Quick: Making these apple pie bars with canned apple pie filling instead of whole apples speeds up this recipe compared to most because you don't have to peel or slice any yourself!
- Easy: With 7 simple ingredients, these bars are incredibly simple to make!
- Unique: They're basically mini bite-sized apple pies and incredibly yummy! Impress your friends and family with a fun spin on a classic dessert!
Ingredients
- Flour
- Granulated Sugar
- Salt
- Butter
- Canned Apple Pie Filling
- Ground Cinnamon
- Ground Nutmeg
See the recipe card below for the ingredient measurements.
Step-by-Step Instructions
Step 1 - Prepare: Preheat the oven to 350 degrees Fahrenheit and lightly grease an 8x8 baking dish and line it with parchment paper.
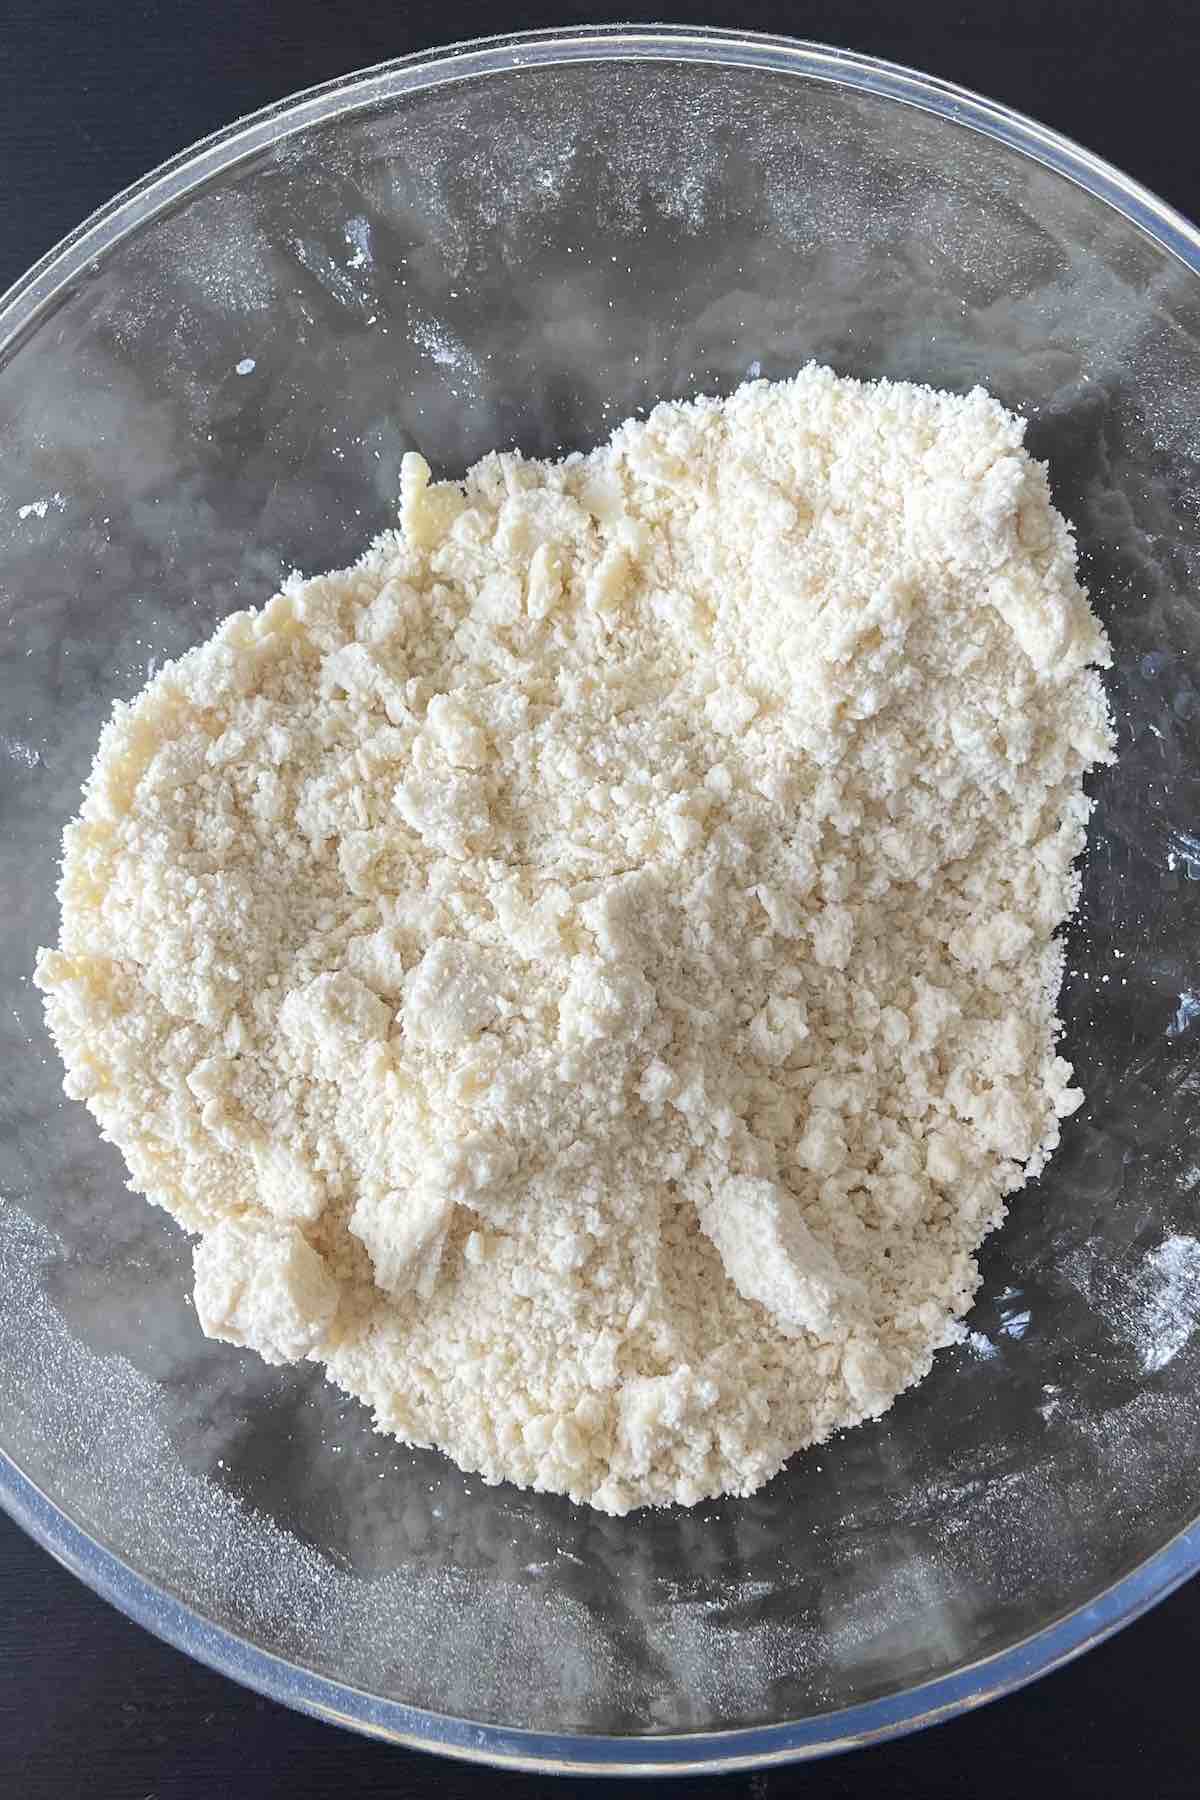
Step 2 - Make the crust: Whisk the flour, granulated sugar, and salt in a bowl. Add the butter and use your hands to incorporate it into a crumbly mixture. Evenly distribute and press ⅔ of the mixture firmly into the baking dish and bake it for 18-20 minutes or until the edges are lightly browned.


Step 3 - Make the filling: While the crust is baking, mix the canned apple pie filling, cinnamon, and nutmeg in a separate bowl.


Step 4 - Bake: Pour the filling over the prebaked crust, sprinkle the top with the remaining ⅓ of the crumbly mixture, and bake for another 18-20 minutes. Transfer to a cooling rack for 30 minutes, then transfer it to the fridge until completely cooled before slicing into squares.


Step 5 - Serve: You can cut into squares in the pan or lift the bars out of the pan from the parchment paper edges and transfer them to a cutting board to cut them.


How to Store
Store the bars in an airtight container in the fridge or a cool area for up to one week or freeze for up to three months.

Helpful Tips
- While making the crust, it will take a bit of time for it to get crumbly, and you might be wondering if it's working, but just keep incorporating it, and it will become crumbly.
- Chopping the apples will make them smaller and easier to bite into. If you leave them whole from the can then some bars will have apples, some won't, and they'll be slipping and sliding when you go to take a bite of one.
- Cooling the bars before cutting into them are essential for getting clean cut squares. If the bars are warm, the pie filling will ooze everywhere.
- Lining the baking dish with parchment paper will make lifting the bars and cutting them into squares easier. It can get a bit messy if you try cutting them in the pan.
- Wiping the knife with a paper towel between cuts will give each bar a cleaner cut.
- If preferred, the bars can be cut into smaller pieces instead of 16 squares.
Frequently Asked Questions
Yes, you can use fresh apples if you prefer. You should peel them, remove the seeds and chop into small pieces to ensure they cook through. You may also consider adding a few other ingredients to the apples such as vanilla extract, lemon juice, and cornstarch.
The crumble on top should start to slightly brown around the edges.
Other Dessert Bars
Some other delicious dessert bars you may like are these apple streusel cheesecake bars, butter tart bars, and butter pecan bars with shortbread crust too!
Print📖 Recipe

Easy Apple Pie Bars (Canned Pie Filling)
- Total Time: 50 minutes
- Yield: 16 squares
- Diet: Vegetarian
Description
These easy apple pie bars are a quick dessert to make for any occasion and especially Thanksgiving!
Ingredients
- Flour: 2 and ⅔ cups
- Granulated Sugar: ½ cup
- Salt: ¼ teaspoon
- Butter: 1 cup, softened
- Canned Apple Pie Filling: one 21 oz can, chopped into small pieces
- Cinnamon: 1 teaspoon
- Nutmeg: 1 teaspoon
Instructions
- Prepare: Preheat the oven to 350 degrees Fahrenheit and lightly grease an 8x8 baking dish and line it with parchment paper.
- Make the crust: Whisk the flour, granulated sugar, and salt in a bowl. Add the butter and use your hands to incorporate it into a crumbly mixture. Evenly distribute and press ⅔ of the mixture firmly into the baking dish and bake it for 18-20 minutes or until the edges are lightly browned.
- Make the filling: While the crust is baking, mix the canned apple pie filling, cinnamon, and nutmeg in a separate bowl.
- Bake: Pour the filling over the prebaked crust, sprinkle the top with the remaining ⅓ of the crumbly mixture, and bake for another 18-20 minutes. Transfer to a cooling rack for 30 minutes, then transfer it to the fridge until completely cooled before slicing into squares.
- Serve: You can cut into squares in the pan or lift the bars out of the pan from the parchment paper edges and transfer them to a cutting board to cut them.


Notes
While making the crust, it will take a bit of time for it to get crumbly, and you might be wondering if it's working, but just keep incorporating it, and it will become crumbly.
Chopping the apples will make them smaller and easier to bite into. If you leave them whole from the can then some bars will have apples, some won't, and they'll be slipping and sliding when you go to take a bite of one.
Cooling the bars before cutting into them are essential for getting clean cut squares. If the bars are warm, the pie filling will ooze everywhere.
Lining the baking dish with parchment paper will make lifting the bars and cutting them into squares easier. It can get a bit messy if you try cutting them in the pan.
Wiping the knife with a paper towel between cuts will give each bar a cleaner cut.
If preferred, the bars can be cut into smaller pieces instead of 16 squares.
Nutrition facts are for informational purposes only. We are not responsible for any errors. We have tested the recipe for accuracy, but your results may vary. Please note that this is not medical or nutrition advice. Seek advice from a licensed professional if you need advice. We are not liable for any damages caused by your use of this content.
- Prep Time: 10 minutes
- Cook Time: 40 minutes
- Category: Dessert, dessert bars
- Method: Bake
- Cuisine: American


Comments
No Comments