
Save time in the kitchen with this easy cherry pie with canned filling recipe that's quick to make with just 5 ingredients. It's incredibly delicious and a crowd-pleasing dessert any time of year!

Jump to:
This is one of my favourite desserts to make when I need a quick dessert with few ingredients that won't take me long to put together! Everyone always loves it, especially when I serve it warm with some vanilla ice cream on the side.
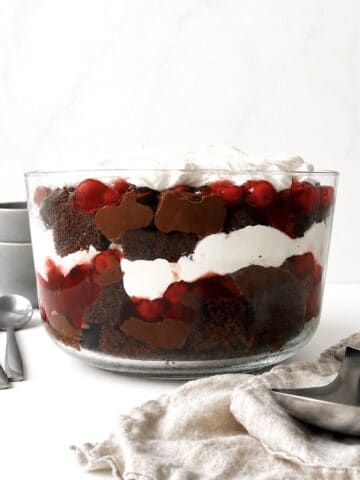
If you're looking for more cherry pie filling desserts, then you should check out my chocolate cherry dump cake, 3 ingredient cherry cobbler with cake mix, black forest trifle, cherry muffins with pie filling, cherry cream cheese pie, and these mini cherry tarts!
Some more easy pie recipes with canned pie filling you should try is this apple pie with puff pastry, this easy blueberry pie with canned filling and apple pie with canned filling!
Some other fruit pies you may like is this easy peach pie with canned peaches and this strawberry pie with graham cracker crust!
Why you'll love this recipe
- Quick & Easy: It comes together quickly with simple steps and just 5 ingredients. Using frozen, pre-made pie crust and canned pie filling really speeds up the baking process (no pitting any cherries required!!)
- Festive: The bright red colours from the cherry pie filling makes this the best dessert for Christmas, the fourth of July, or Canada Day!
- Crowd-Pleasing: Anyone you share this pie with is going to love it!
Ingredients
- Canned Cherry Pie Filling (not canned cherries, those are different!)
- Corn Starch (this is a key ingredient to ensure the filling is thick and not runny)
- Frozen Pie Shells (you can alternatively make a homemade pie crust recipe if you prefer too)
- Milk (this makes the pie crust golden, alternatively, you can use an egg wash)
- Sugar
See the recipe card below for the ingredient measurements.
Step-by-Step Instructions
Step 1 - Prepare: Preheat the oven to 350°F.
Step 2 - Assemble: Mix the corn starch into the cherry pie filling, then pour the filling into one of the pie crusts. Flip the other pie crust on top of the pie, and use a fork to seal the edges together (refer to the package instructions for exact details, as some instructions differ). Cut slits into the top of the pie, then brush it with milk and sprinkle sugar evenly over the top.


Step 3 - Bake: Bake the pie on the middle rack uncovered for 35-45 minutes until golden. Let it rest for a few minutes to thicken before serving.

Storage and Leftovers
Store any leftover pie covered tightly with tin foil or plastic wrap (once room temperature) in the fridge for up to 1 week. You can reheat it uncovered at 350 degrees Fahrenheight until warm or microwave slices on a microwave-safe plate at intervals of 15 seconds.

Helpful Tips
- Corn starch is a key ingredient for ensuring the pie filling is thick and not runny. Some canned pie filling will list corn starch as an ingredient, but in my experience, if you don't add extra, it tends to still be runny.
- Brushing the top of the pie with milk or an egg wash gives the pie a golden colour.
- Cutting slits into the top of the pie is important for allowing the pie to breathe and bake thoroughly.
Frequently Asked Questions
This can happen if there isn't enough corn starch mixed with the pie filling. Ensure you add at least one tablespoon.
10 minutes should be long enough, but the longer the better to avoid a runny pie that hasn't fully set.
Yes, feel free to swap the cherry pie filling with canned blueberry pie filling, strawberry pie filling, apple pie filling, canned peaches, etc. Fresh and frozen fruit works too, but you may want to add some sugar to sweeten it up.
📖 Recipe

Easy Cherry Pie with Canned Filling
- Total Time: 40 minutes
- Yield: 8
- Diet: Vegetarian
Description
This easy cherry pie with canned filling is a quick and delicious dessert!
Ingredients
- Canned Cherry Pie Filling: one 21 oz can
- Corn Starch: 1 tablespoon
- Frozen Pie Crusts: 2 pack (or make your own pie crust recipe)
- Milk: ½ tablespoon
- Sugar: 1 teaspoon
Instructions
- Prepare: Preheat the oven to 350°F.
- Assemble: Mix the corn starch into the cherry pie filling, then pour the filling into one of the pie crusts. Flip the other pie crust on top of the pie, and use a fork to seal the edges together (refer to the package instructions for exact details, as some instructions differ). Cut slits into the top of the pie, then brush it with milk and sprinkle sugar evenly over the top.
- Bake: Bake the pie on the middle rack uncovered for 35-45 minutes until golden. Let it rest for a few minutes to thicken before serving.
Notes
Corn starch is a key ingredient for ensuring the pie filling is thick and not runny. Some canned pie filling will list corn starch as an ingredient, but in my experience, if you don't add extra, it tends to still be runny.
Brushing the top of the pie with milk or an egg wash gives the pie a golden colour.
Cutting slits into the top of the pie is important for allowing the pie to breathe and bake thoroughly.
Nutrition facts are for informational purposes only. We are not responsible for any errors. We have tested the recipe for accuracy, but your results may vary. Please note that this is not medical or nutrition advice. Seek advice from a licensed professional if you need advice. We are not liable for any damages caused by your use of this content.
- Prep Time: 5 minutes
- Cook Time: 35 minutes
- Category: Dessert, pie
- Method: Bake
- Cuisine: American

Andrea says
This cherry pie is bursting with delicious cherry flavour and the red is so festive! Did you enjoy it?:)
Cecelia says
Does this cook without a soggie bottom?
Andrea says
Yes! It's never been soggy for me. Frozen crusts do vary however, but if you're worried, you can always bake it on one rack lower than the middle rack in the oven.